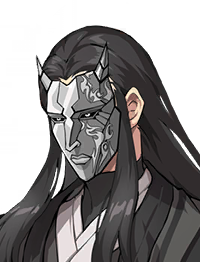
[Revolution] Twenty-Fifth Bam
Rankings
Ranker
Ranker
Bam has good utility in his base kit, with nice CC and DEF shred, his survivability is also great.
If you invest in him, his damage is high even at high deficits.
Rapport Item
Special Move - First Thorn Fragment Transcendence Skill: Startdust
Bam becomes invincible and summons a Triple Orb to cast Stardust. It causes a star explosion in the area with the most enemies, dealing 600% of Bam's ATK as DMG three times, and sending enemies Airborne for 3s on the final explosion.
Leaves debris for 20s, dealing 300% of ATK as DMG every second to enemies within the area. (Max: 3 debris)
Active Skill - True Black Wing Floral Butterfly Piercing Technique
Bam teleports to an enemy, absorbs Shinsu and pulls enemies into a fan-shaped area, immobilizing them for 4s.
Deals 1,200% of Bam's ATK as DMG in a straight line before returning him to the starting position.
Active Skill - True Blue Oar
Bam becomes invincible while flying and shoots the Shinsu Cannon 8 times at a random enemy, each time dealing 300% of his ATK as DMG and reducing the enemy's DEF by 30% for 20s. (Max: 8 stacks)
Then Bam descends rapidly, dealing 800% of his ATK as DMG to nearby enemies, Knocking them Back for 4s.
Passive - Thorn: Awakened
Activates Orb Defense Mode at the start of the battle, blocking one skill attack. If an enemy is blocked by the orb, it deals 200% of Bam's ATK as DMG to enemies and Silences them for 3s.
The orb can be reactivated after 4s.
When Bam's HP falls below 40%, he becomes invincible for 4s, uses Thorn: Awakened and recovers HP equal to 80% of his max HP.
Additionally, until the end of the battle, when using Skills to attack an enemy, DMG is applied with the target's Magic Resistance reduced by 50%
EE Stat
Critical DMG Increase
Level 1 Effect
True Blue Oar is enhanced, increasing the ATK by 100% each time the Shinsu Cannon strikes the same target.
Level 2 Effect
True Black Wing Floral Butterfly Piercing Technique grants Invincibility.
Level 3 Effect
The cooldown of True Blue Oar resets when hit by a melee attack. The cooldown reset does not activate again for 8s.
Level 4 Effect
Using the power of Thorn: Awakened recovers 1,000 Energy and reduces the remaining cooldown for each Active Skill by 80%.
Revolution 4: First Thorn Fragment Transcendence Skill: Stardust
Reduces the Swiftness of enemies hit by First Thorn Fragment Transcendence Skill: Stardust by 40 and MOV SPD by 30% (Max: 3 stacks)
Revolution 5: Thorn: Awakened
Thorn: Awakened increases Magic Pierce by 30%, Special Move Peirce by 40% and DMG Lifesteal by 80% until the end of the battle. (This buff cannot be removed with buff removal skills.)
Revolution 6 [PvP ONLY]
Bam’s ATK increases by 50% and Swiftness by 50 in Arenas.
(This buff cannot be removed with buff removal skills.)
For detailed information on which investment is needed, please refer to the "Investment Guide" section.
Notes
Bam's survivability is already good, so he is not forced to rely on Bari.
Doris is his best set when you are using him for his supporting capabilities, El is the best set when you are trying to run him as your DPS unit.
Rafflesia works well too, giving additional protection from Status Effects.
For detailed information on stats and upgrades, please check the Investment Guide section below.
General Information
What does this unit provide to the team?
DEF Decrease, Swiftness Decrease, MOV SPD Decrease, AoE Crowd Control
What does this unit need from the team?
Grouping, HP Recovery Block, Barrier Break, Active Skill Cooldown Decrease
Which enemies should you avoid?
Potentially nobody
Which enemies is this unit good against?
Potentially anyone
Unit Synergies
Basic Teams
These are just example teams and are by no means the best possible combinations. We avoid using units that are not easily obtainable or common.
Mono-Color Team
Multi-Color Team
Anaak is providing the HP Recovery Block. Bam and Albelda are providing the damage.
Rankings
Deficit < 350
A+
Deficit > 350
A+
Requirements
+30
Lv. 6
Gear Configuration
+0
+4
+0
+0
If upgrading Slot 3 can get your EVA to be higher than the enemy ACC, upgrading Slot 3 could be worth it.
If your Deficit is higher than 300 / 350, Slot 4 Resistances are pretty much ineffective and can be left to +0.
The flat ATK, DEF and HP stats are useless.
Ignition Weapon
+16
+12
+12
+16
Critical DMG Increase+16
Magic PierceMagic Pierce, Crit DMG Increase, ACC, EVA, Effect Hit, Effect Resistance, Crit Rate Increase
Revolution
- ACC (Level 20)
- Swiftness (Level 20)
- Effect Hit (Level 20)
Rankings
Deficit < 350
Ranker
Deficit > 350
Ranker
Requirements
+35
Lv. 6
Gear Configuration
+0
+5
+0
+0
If upgrading Slot 3 can get your EVA to be higher than the enemy ACC, upgrading Slot 3 could be worth it.
If your Deficit is higher than 300 / 350, Slot 4 Resistances are pretty much ineffective and can be left to +0.
The flat ATK, DEF and HP stats are useless.
Ignition Weapon
+20
+16
+16
+20
Critical DMG Increase+20
Magic PierceMagic Pierce, Crit DMG Increase, ACC, EVA, Effect Hit, Effect Resistance, Crit Rate Increase
Revolution
- ACC (Level 20)
- Swiftness (Level 20)
- Effect Hit (Level 20)
- Critical Hit Rate (Level 20)
- ATK (Level 20)
- Critical DMG Increase (Level 20)
Additional Notes
If you are only using Revolution Bam as a Support, stopping temporarily at Orange 4 is ok.
Rankings
Deficit < 350
Ranker
Deficit > 350
Ranker
Requirements
+40
Lv. 6
Gear Configuration
+0
+5
+0
+0
If upgrading Slot 3 can get your EVA to be higher than the enemy ACC, upgrading Slot 3 could be worth it.
If your Deficit is higher than 300 / 350, Slot 4 Resistances are pretty much ineffective and can be left to +0.
The flat ATK, DEF and HP stats are useless.
Ignition Weapon
+20
+20
+20
+20
Critical DMG Increase+20
Magic PierceMagic Pierce, Crit DMG Increase, ACC, EVA, Effect Hit, Effect Resistance, Crit Rate Increase
Revolution
- ACC (Level 20)
- Swiftness (Level 20)
- Effect Hit (Level 20)
- Critical Hit Rate (Level 20)
- ATK (Level 20)
- Critical DMG Increase (Level 20)
- Max Cooldown Reduction (Level 20)
- Special Move Pierce (Level 20)
